Solutions / Hearing Aid Fitting / How to Use Affinity Compact’s Probe Placement Indicator
How to Use Affinity Compact’s Probe Placement Indicator
How to Use Affinity Compact’s Probe Placement Indicator
Learn how to use Affinity Compact’s Probe Placement Indicator in this short, step-by-step guide.
The importance and challenges of probe tube placement
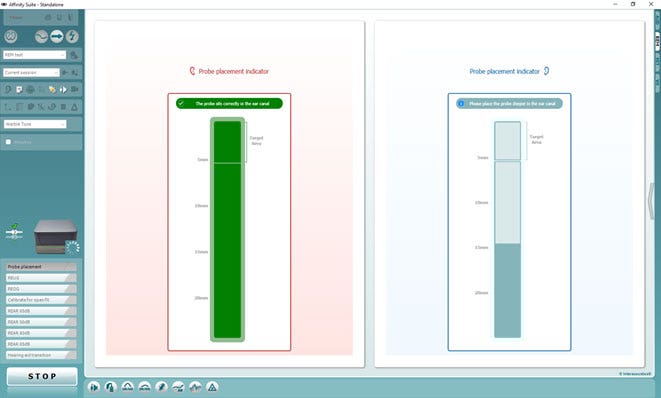
In this quick guide, you’ll learn how to use the Probe Placement Indicator in the Affinity Compact software.
Probe tube placement is critical when performing real-ear measurements (REMs), as it serves as your point of reference for all the measurements you’ll perform. To ensure accurate REMs, you need a correct probe tube insertion depth.
REM is the ‘gold standard’ of hearing aid fitting and whilst otoscopy and probe tube markers can help, it can still be challenging to place the probe tube correctly and avoid contact with your client’s ear drum. For this reason, the Affinity Compact software provides you with the option of using the Probe Placement Indicator.
Please note: The Probe Placement Indicator was developed and validated for adults with normal outer and middle ear function. Use with other patient populations is not advised.
The Probe Placement Indicator is based on machine learning and assists you with probe tube placement. It works by tracking the probe tube insertion depth in real time. The software provides a visible and audible signal when you’ve inserted the probe tube at the correct depth, within 5 mm of the ear drum.
The two main benefits are:
You avoid any contact with your client’s ear drum
You know you’re performing accurate REMs
Contact your local distributor
Our world-wide experts are ready to help you find the right solution.